Hello world
Now that we have a basic skeleton of a custom story folder, we can begin creating a simple map. Once this is done, we can finally test our custom story to make sure everything is working up to this point.
Go (back) to the main TDD folder. If you installed the development tools already, find LevelEditor.exe and run it.
The level editor
When you first start the level editor, it will have an empty map loaded, ready to place objects into. Let's have a quick overview of what is what.
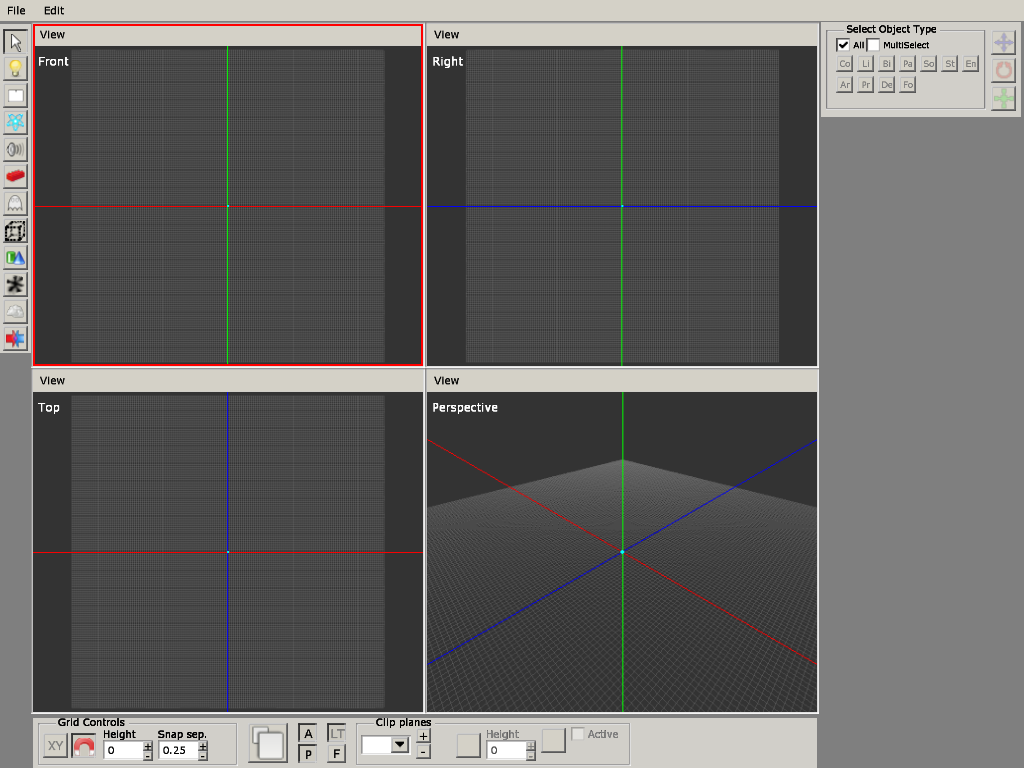
- The top section contains the menu bar, with basic operations such as creating, saving, and opening levels. It also has some properties and settings for the editor itself.
- The left section contains a list of different tools. Most of these tools relate to placing down some type of object, such as lights, entities, ambient sounds, etc.
- The right section has different options based on the context. For example, if you choose the "entity" tool, it will have a list of entities to pick from. If you select a placed object with the "select" tool, it will display properties for the selected object.
- The bottom section has a few options for editor controls and visibility.
- The middle section is the viewport, which is where you will see the actual level. By default it is split into 4 smaller viewports, 3 of which are 2D and the last being a 3D perspective. You can maximize one of the viewports by hovering the mouse on it and pressing Space.
To control the camera inside the level editor, hold down the ALT button on your keyboard. While holding it down:
- Left-click and drag with the mouse to rotate the camera around the blue pivot point in the middle.
- Right-click and drag to adjust the zoom level (you can also just use the mouse scroll wheel).
- Middle-click (wheel down) to pan the camera and move the blue pivot point around on the grid.
There are many things you can do to construct your levels, but for now we will go ahead with the most basic features you will need to make a level functional.
Making a level
To make a level technically playable, we need a few things:
- A floor so we don't fall into the endless void.
- A light so we can actually see something around us.
- A PlayerStart area, which tells the game where to place us when we load in.
Something to stand on
Let's start with number 1. Choose the "Primitives" tool on the left side (icon of a green cylinder and blue cone). This tool can be used to place down "planes" which are primitive models consisting of only a single, 2D, flat face. Before we can place one down, we must select a material for this plane. A material is a collection of properties applied to a texture file, so the material will primarily decide how the plane looks.
Click the ... button on the right section to bring up the built-in file browser. By default it starts in the main TDD folder. Most materials are found inside static_objects, so let's go there. Then we can pick one of the asset collections, such as "castlebase" or "mansionbase". Each of these two have a "floors" folder where materials commonly used for flooring can be found. Pick any texture you like.
With a material now loaded, click and drag across the viewport. The "Top" or "Perspective" viewports are best for floors. When you release the mouse button, a plane will be created in the level.
If you need to move or resize the plane you created, use the "select" tool (shortcut "1") and click the plane. You will see in the corner red, green and blue arrows. These are called the translation controls (shortcut "Q") and can be clicked and dragged to move the object. Notice the 3 buttons in the top-right corner of the right panel. These buttons allow you to switch between translation, rotation (shortcut "W") and scale (shortcut "E") controls. The rotation controls will look like colored circles instead of arrows, and the scale controls will look like arrows except with cube heads.
Let there be light
Next up, add a light. Select the "Lights" tool (icon of a yellow light bulb) and click somewhere to place down a light or two. You can use the "Select" tool afterward to move and resize lights. We will get back to lights in a later part.
Our spawn point
Finally we will place down the PlayerStart area. Areas are invisible boxes that are used for interactive functionality. Go to the "Area" tool (icon of a dotted box frame). In the right panel, there's a dropdown menu for the type of area you want to use. The very last option (you have to scroll) is called PlayerStartArea. Select it, and click somewhere on your plane to place it down.
Don't forget to save
All that remains now is to go to File > Save, and save the map inside your custom story's maps folder, matching the name you put in the config file. For example custom_stories/My Story/maps/first_level.map.
Great, we've come this far so now let's see if everything works so far.